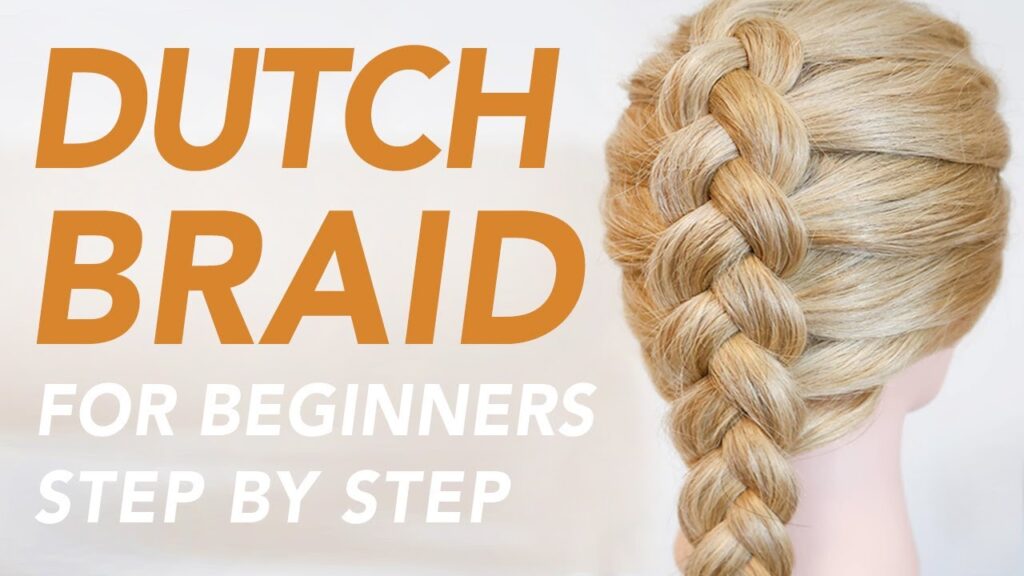
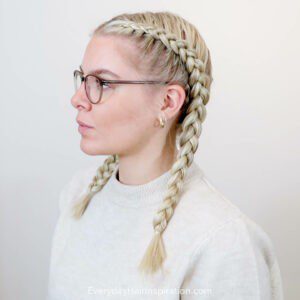
 Braids have been a timeless and beloved hairstyle for centuries, and one of the most popular variations is the Dutch braid. This versatile braid not only looks stunning but also keeps your hair neatly in place. Whether you’re heading to a formal event or simply want an everyday chic look, mastering the art of Dutch braiding your own hair is a valuable skill.
In this comprehensive guide, we’ll walk you through the process of Dutch braiding your own hair, step by step. By the end, you’ll be able to create intricate Dutch braids that turn heads wherever you go. So, grab your hairbrush and let’s get started!
Contents
- 1 How to Dutch Braid Your Own Hair?
- 2 Step-by-Step Guide: How to Dutch Braid Your Own Hair
- 2.1 a. Sectioning Your Hair
- 2.2 b. Beginning the Braid
- 2.3 c. Adding Hair to the Braid
- 2.4 d. Finishing the Braid
- 2.5 Tips for a Perfect Dutch Braid
- 2.6 1. Practice Makes Perfect
- 2.7 2. Tension Matters
- 2.8 3. Use a Mirror
- 2.9 4. Hair Products
- 2.10 Dutch Braid Variations
- 2.11 1. Dutch Crown Braid
- 2.12 How to Create a Dutch Crown Braid
- 2.13 2. Dutch Fishtail Braid
- 2.14 How to Create a Dutch Fishtail Braid
- 2.15 3. Messy Dutch Braid
- 2.16 How to Create a Messy Dutch Braid
- 2.17 Maintaining Your Dutch Braid
- 2.18 1. Hairpins: Securing Loose Ends and Flyaways
- 2.19 2. Hairspray: Locking in Your Braid
- 2.20 3. Night Care: Preserving Your Braid Overnight
- 3 FAQs (Frequently Asked Questions)
- 3.1 Q1: How long does my hair need to be for a Dutch braid?
- 3.2 Q2: Can I Dutch braid my hair if it’s curly or wavy?
- 3.3 Q3: How do I prevent my Dutch braid from unraveling?
- 3.4 Q4: Can I create a Dutch braid on wet hair?
- 3.5 Q5: How long does it take to learn how to Dutch braid your own hair?
- 3.6 Q6: Can I wear a Dutch braid for formal occasions?
- 4 Conclusion
How to Dutch Braid Your Own Hair?
Understanding the Dutch Braid
Before we dive into the tutorial, let’s clarify what a Dutch braid is. Also known as an inverted braid or reverse braid, the Dutch braid is a three-strand braid where the sections of hair are crossed under one another, creating a raised, 3D effect. Unlike the traditional French braid, where sections are crossed over, the Dutch braid adds depth and texture to your hairstyle.
Preparing Your Hair
Before you begin braiding, it’s essential to prepare your hair to ensure a smooth and sleek finish.
- Start with clean, dry hair: Braiding clean hair is easier and more manageable. Wash and condition your hair as needed before you start.
- Brush your hair: Use a paddle brush or a wide-tooth comb to remove any tangles and knots. Smooth, detangled hair is crucial for a neat braid.
- Choose your part: Decide where you want your Dutch braid to start. You can choose a middle part for a symmetrical look or a side part for a more casual style.
Step-by-Step Guide: How to Dutch Braid Your Own Hair
Now, let’s get into the heart of the matter – creating a beautiful Dutch braid on your own hair.
a. Sectioning Your Hair
- Begin by parting your hair where you want the Dutch braid to start. For this tutorial, we’ll assume a middle part.
- Divide a small section of hair near your part into three equal parts, just as you would with a regular braid.
b. Beginning the Braid
- Hold the three sections of hair in your hand, just above your forehead.
- Cross the right section under the middle section. The right section now becomes the new middle section.
- Cross the left section under the middle section. The left section is now your new middle section.
- This completes one round of the Dutch braid. To create the inverted effect, you’ll need to add more hair to each section as you go.
c. Adding Hair to the Braid
- As you cross the right section under the middle section again, gather a small amount of hair from the right side of your head.
- Combine this gathered hair with the right section.
- Cross the combined right section under the middle section.
- Repeat the same process on the left side. Gather a small amount of hair from the left side of your head, combine it with the left section, and cross it under the middle section.
- Continue adding hair from both sides as you work your way down your head, crossing the sections under the middle each time.
d. Finishing the Braid
- Keep adding hair and crossing the sections until you’ve reached the nape of your neck.
- Once you’ve added all the hair from the sides, continue with a regular three-strand braid.
- Secure the end of the braid with a small hair elastic.
Congratulations! You’ve successfully Dutch-braided your own hair. But before you step out with your stunning braid, here are some tips to perfect your technique.
See also: The Best Short Weave Hairstyles 27 Pieces
Tips for a Perfect Dutch Braid
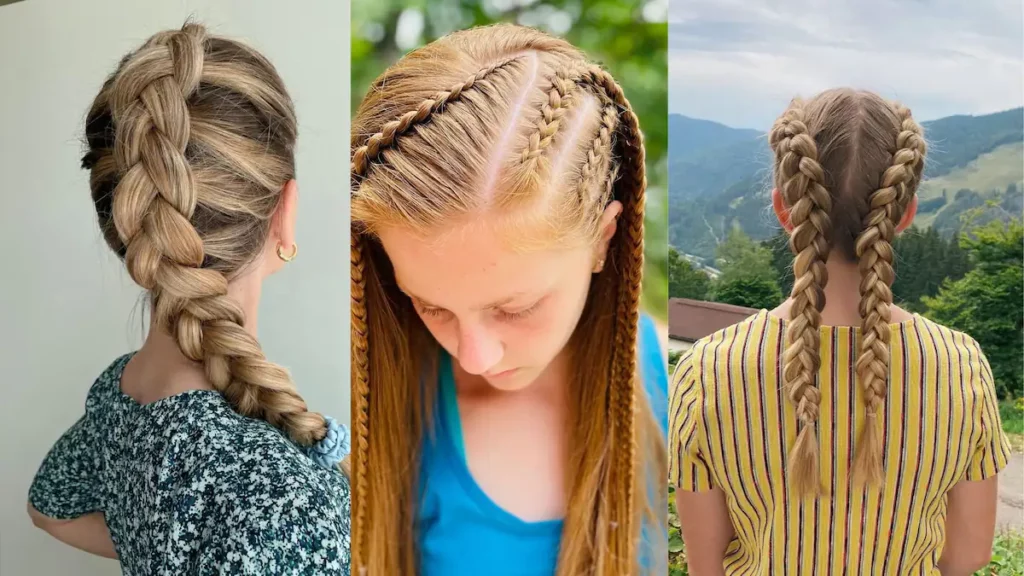
1. Practice Makes Perfect
Braiding, including the Dutch braid, is a skill that improves with practice. Don’t be disheartened if your initial attempts don’t result in the flawless braid you envision. Instead, embrace each practice session as an opportunity to refine your technique. Here’s why practice is crucial:
Muscle Memory: Like any skill, braiding involves muscle memory. The more you practice, the more your hands and fingers become accustomed to the movements required for braiding. Over time, this will lead to smoother, more controlled braids.
Understanding Your Hair: Each person’s hair is unique, and learning how your hair behaves during braiding is essential. Through practice, you’ll gain insights into your hair’s texture, thickness, and quirks, allowing you to adapt your technique accordingly.
Building Confidence: Confidence plays a significant role in braiding. With practice, you’ll feel more self-assured in your abilities, and this confidence will reflect in the quality of your braids.
Remember, even seasoned braiders started with simple, imperfect braids. Be patient with yourself and enjoy the learning process.
2. Tension Matters
Maintaining consistent tension on the sections of hair as you braid is a fundamental aspect of achieving a sleek and uniform Dutch braid. Here’s why tension matters:
Even Appearance: Proper tension ensures that the sections of hair lie smoothly against each other, creating an even and tidy braid. Inconsistent tension can result in bumps or irregularities along the braid.
Secure Hold: Adequate tension keeps the braid secure throughout the day. You won’t have to worry about it unraveling or falling apart.
To maintain the right tension:
- Avoid pulling too tightly, as this can be uncomfortable and may lead to headaches.
- Conversely, avoid being too loose, as it can result in a messy and less polished look.
- Keep your hands steady and apply gentle but consistent pressure as you braid.
It may take some time to find the perfect tension that works for your hair, but practice will help you achieve it.
3. Use a Mirror
A mirror is an invaluable tool when Dutch braiding your own hair. Here’s why having a mirror in front of you is essential:
Visual Feedback: A mirror provides real-time visual feedback on your braiding progress. It allows you to see your hands’ positioning and how your braid is forming from a different perspective.
Precision: When you can see what you’re doing, you’re better equipped to make precise adjustments. This helps you catch any errors early on and create a neater braid.
Learning Opportunity: Over time, using a mirror will help you become more self-sufficient in braiding. You’ll rely less on feeling the braid and more on visual cues, which is especially helpful for intricate styles.
Whether you’re a beginner or an experienced braider, a mirror is a must-have tool to enhance your Dutch braiding skills.
4. Hair Products
Hair products can be your best friends when it comes to achieving a flawless Dutch braid. Here’s how they can assist you:
Frizz Control: If you have flyaways or frizz in your hair, using a bit of hair serum or gel before braiding can help tame unruly strands. Apply a small amount to your palms, rub them together, and then run your hands over your hair to smooth it.
Texture and Grip: Some hair products can provide added texture and grip, making it easier to work with your hair during the braiding process. This is particularly helpful if you have fine or slippery hair.
Hold and Finish: Hair products can help set your braid and provide a polished finish. A light mist of hairspray or a drop of serum on the finished braid can help it stay in place throughout the day.
When using hair products, remember that a little goes a long way. Start with a small amount, and you can always add more if needed. Experiment to find the products that work best for your hair type and desired braid style.
Incorporating these tips into your Dutch braiding routine will undoubtedly help you achieve the perfect braid. Remember that braiding is an art, and like any art form, it requires patience, practice, and a willingness to learn and adapt. Embrace the journey of perfecting your Dutch braid, and soon, you’ll be creating stunning hairstyles with confidence and ease.
Dutch Braid Variations
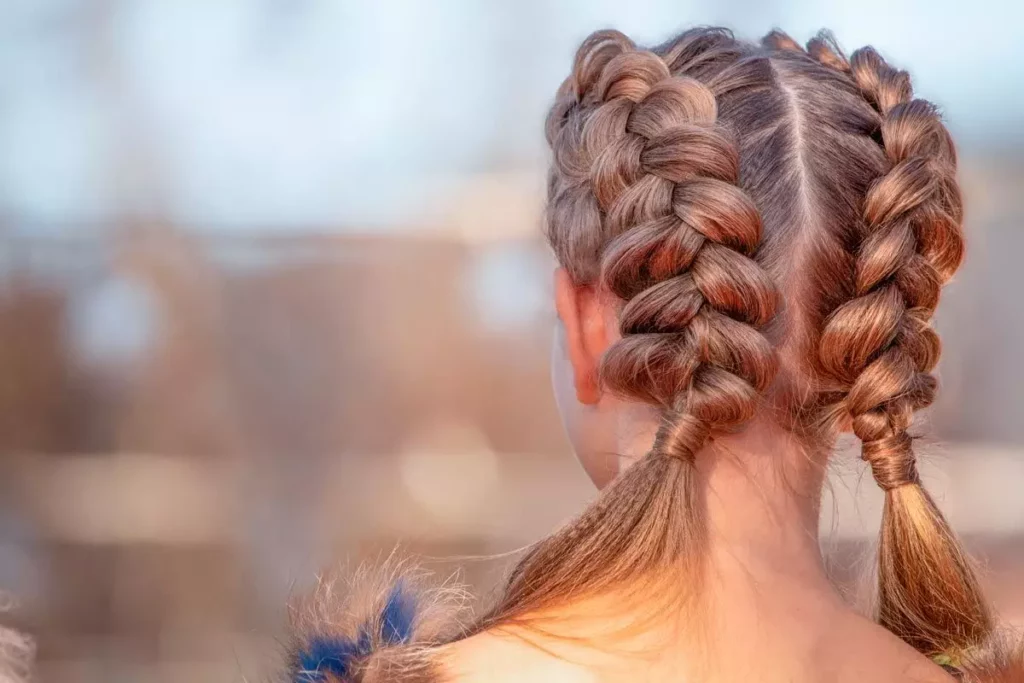
The Dutch braid is incredibly versatile and can be adapted to various styles:
1. Dutch Crown Braid
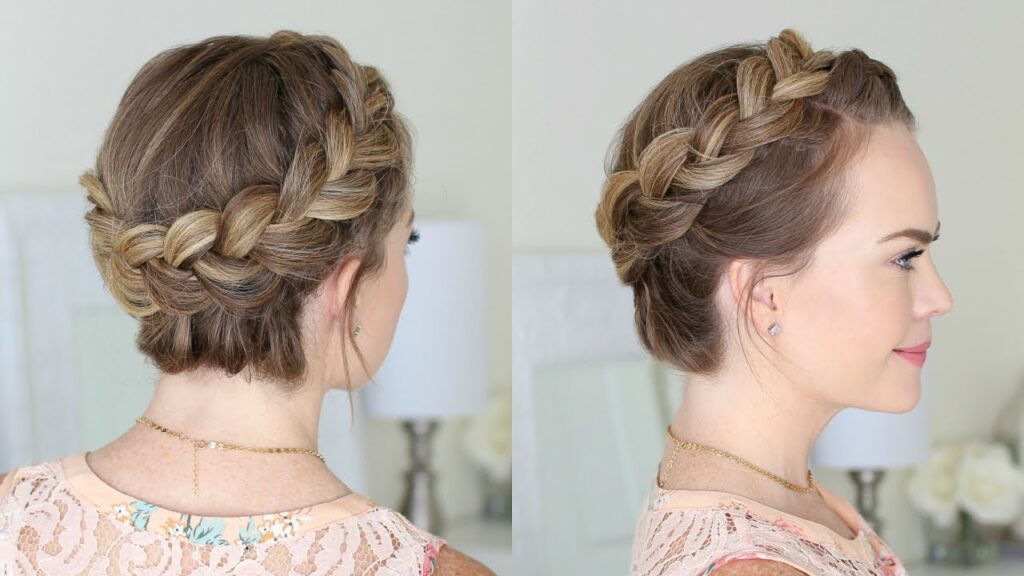
The Dutch Crown Braid is a charming and elegant hairstyle that gives you a regal and sophisticated appearance. It’s a perfect choice for special occasions, weddings, or any time you want to feel like royalty.
How to Create a Dutch Crown Braid
- Begin with a center part in your hair.
- Take a small section of hair near your left temple, just above your ear, and start Dutch braiding. This means you’ll be crossing the sections of hair underneath each other, adding more hair from the sides as you go.
- Continue Dutch braiding along your hairline, following the shape of your head.
- Once you reach the right temple, continue braiding down the length of your hair, but keep the braid close to your head.
- Secure the end of the braid with a small hair elastic.
- Repeat the same process on the other side of your head, creating a second Dutch braid.
- Once you have both braids, gently pull on the sides of the braids to loosen them and create a fuller, crown-like effect.
- Secure the ends of both braids together at the back of your head with bobby pins.
The result is a beautiful and intricate crown braid that frames your face and adds a touch of sophistication to your look.
2. Dutch Fishtail Braid
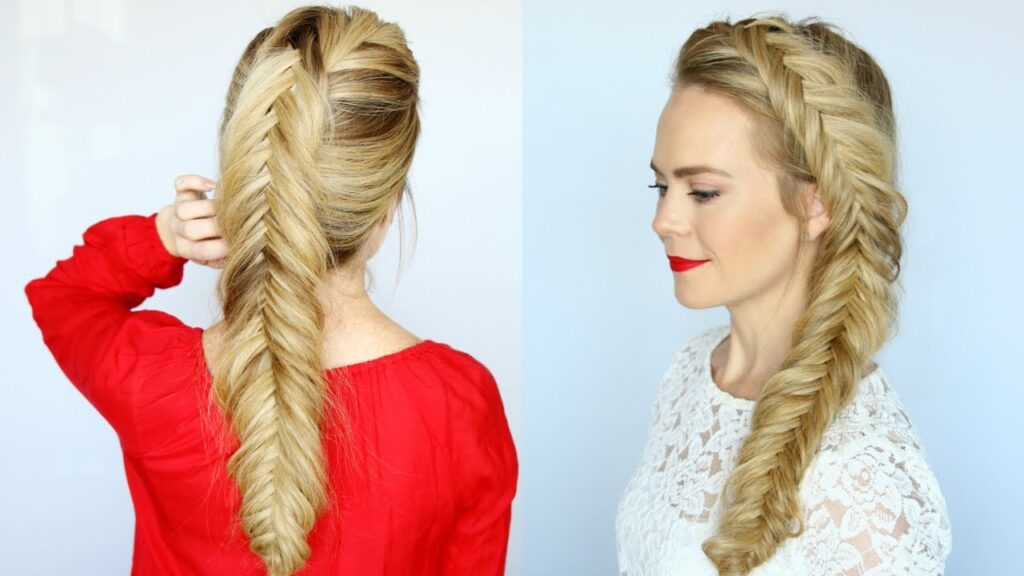
If you’re looking for a more intricate and visually striking braid, the Dutch Fishtail Braid is an excellent choice. This style combines the Dutch braiding technique with the unique texture of a fishtail braid, creating a stunning, eye-catching look.
How to Create a Dutch Fishtail Braid
- Begin by parting your hair down the middle to create two even sections.
- Pick up a small section of hair near the left side of your part.
- Divide this section into two equal parts.
- Cross a small piece from the left section over to the right section.
- Now, cross a small piece from the right section over to the left section.
- Repeat this process, adding small sections of hair from the sides into each section as you go. Make sure you’re crossing the sections under each other, just like in a Dutch braid.
- Continue braiding down the length of your hair.
- Secure the end with a small hair elastic.
The Dutch Fishtail Braid creates a mesmerizing, textured effect that’s perfect for special occasions or when you want to stand out with a unique hairstyle.
3. Messy Dutch Braid
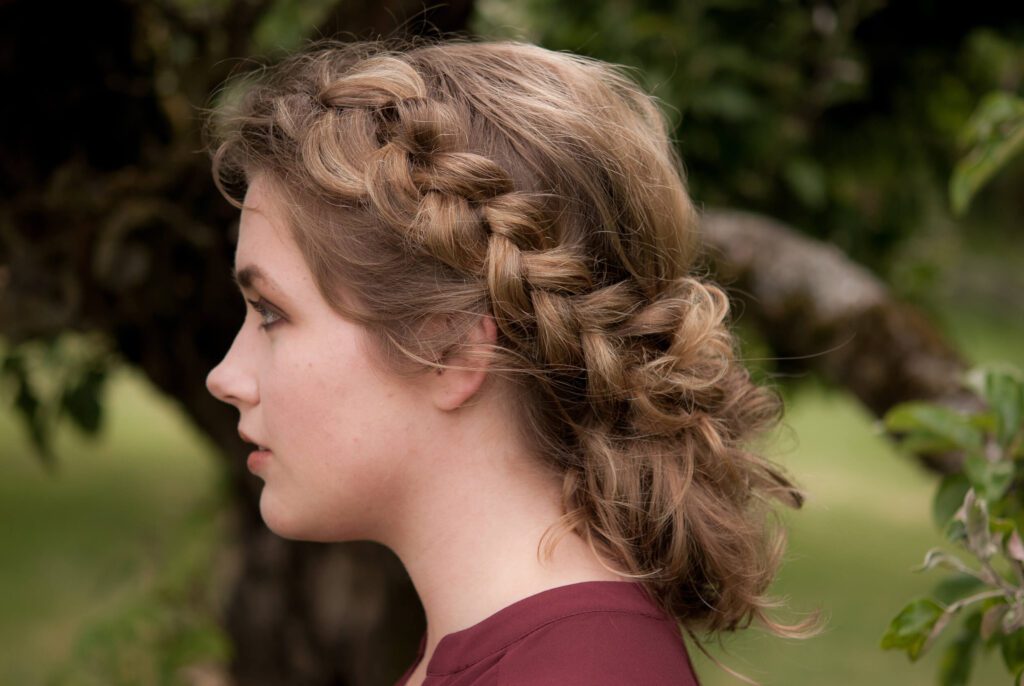
If you prefer a more relaxed and effortlessly chic look, the Messy Dutch Braid is an ideal choice. This style combines the structure of a Dutch braid with a slightly disheveled finish for a laid-back, bohemian vibe.
How to Create a Messy Dutch Braid
- Start by following the steps for a traditional Dutch braid, as outlined earlier in this guide.
- As you braid, instead of keeping the sections tight and neat, gently pull on the sides of the braid after each section is crossed under. This loosens the braid and gives it a relaxed appearance.
- Continue adding hair and braiding, periodically tugging on the sides of the braid to maintain the messy effect.
- Once you’ve reached the end, secure the braid with a hair elastic.
The Messy Dutch Braid is perfect for casual outings, beach days, or any time you want a carefree and boho-inspired hairstyle that exudes natural beauty and style.
These Dutch braid variations offer a range of styles to suit different occasions and preferences. Whether you opt for the regal Dutch Crown Braid, the intricate Dutch Fishtail Braid, or the relaxed Messy Dutch Braid, you can showcase your creativity and individuality through these beautiful braided hairstyles. Enjoy experimenting and discovering the perfect Dutch braid variation for your unique style and personality.
Maintaining Your Dutch Braid
1. Hairpins: Securing Loose Ends and Flyaways
Hairpins, whether bobby pins or hairpins, are your best friends when it comes to maintaining the neatness of your Dutch braid. Here’s how they can help:
Taming Flyaways: Despite your best efforts, some stray hairs may not cooperate and stick out from your braid. Hairpins allow you to discreetly secure these rebellious strands in place, giving your braid a clean and polished appearance.
Preventing Unraveling: If you notice any sections of your braid starting to come loose, hairpins can help anchor those sections back into place. Simply slide a hairpin through the loose section and secure it to the scalp or the adjacent part of the braid.
Pro Tip: When using hairpins, try to insert them parallel to the braid to minimize their visibility. Choose hairpins that match your hair color for a more discreet look.
2. Hairspray: Locking in Your Braid
Hairspray is a trusty ally when it comes to preserving the shape and hold of your Dutch braid. Here’s how it can help:
Enhancing Hold: After you’ve finished your Dutch braid, give it a light mist of hairspray. This will help lock the braid in place and prevent it from unraveling or losing its shape, especially in humid conditions.
Minimizing Frizz: Hairspray can also work as a frizz-reducing agent. If you have naturally frizzy hair or are dealing with humidity, a fine mist of hairspray can help keep your braid looking sleek and controlled.
Pro Tip: Hold the hairspray at a distance from your head to achieve an even, light coverage without making your hair stiff or crunchy.
3. Night Care: Preserving Your Braid Overnight
If you want to maintain your Dutch braid overnight and wake up with picture-perfect hair, consider these night care tips:
Silk or Satin Pillowcase: Swap your regular cotton pillowcase for a silk or satin one. These materials are much gentler on your hair and reduce friction, which can cause frizz and unraveled braids. Additionally, silk and satin pillowcases help retain the moisture in your hair, preventing it from drying out.
Loose Braid or Bun: Before bedtime, gently loosen your Dutch braid by tugging on the sides. Alternatively, you can transform it into a loose braid or bun. This minimizes tension on your hair and reduces the risk of creases forming in your braid while you sleep.
Secure with a Scrunchie: Use a soft, fabric scrunchie to loosely tie your braid or bun in place. Avoid tight elastics, which can leave marks and disrupt the braid’s structure.
By incorporating these maintenance tips into your Dutch braid routine, you can ensure that your braid remains fresh, sleek, and beautiful for hours on end, and even into the next day. Whether you’re attending a special event, going to work, or simply enjoying a day out, these practices will help you keep your Dutch braid looking flawless and well-maintained.
Also read: Cute Volleyball Hairstyles for 2024
FAQs (Frequently Asked Questions)
Q1: How long does my hair need to be for a Dutch braid?
While you can create a Dutch braid with relatively short hair, it’s easier to manage with hair that’s at least shoulder length. Longer hair allows for more intricate and eye-catching braids.
Q2: Can I Dutch braid my hair if it’s curly or wavy?
Absolutely! Dutch braids work well with various hair textures, including curly and wavy hair. In fact, the braid can add dimension to your natural texture.
Q3: How do I prevent my Dutch braid from unraveling?
Ensure that you’re crossing the sections under each other tightly and securing the end with a small hair elastic. If needed, use a bit of hair product to help control any flyways.
Q4: Can I create a Dutch braid on wet hair?
It’s generally better to Dutch braid dry hair because it’s more manageable. Wet hair can be slippery and may not hold the braid well.
Q5: How long does it take to learn how to Dutch braid your own hair?
The time it takes to master Dutch braiding varies from person to person. With regular practice, you can expect to become proficient within a few weeks.
Q6: Can I wear a Dutch braid for formal occasions?
Absolutely! Dutch braids can be dressed up or down, making them suitable for both casual and formal events. You can even embellish them with accessories for added elegance.
Conclusion
Dutch braiding your own hair may seem challenging at first, but with patience and practice, you’ll soon become a braiding pro. This versatile hairstyle is perfect for everyday wear, special occasions, and everything in between. Experiment with different variations and enjoy the confidence that comes with mastering this timeless braid. So, grab your hairbrush, follow our step-by-step guide, and start Dutch braiding your way to fabulous hair today!

